Home               About                Treats               Cut-out Treats               Frozen Treats               Mochi
Showing posts with label treats. Show all posts

Sunday, March 31, 2013

Carrot-Apple Dog Treats


Hoppy Easter!

Target's seasonal section always drags me in when I do my grocery shopping. I usually try to stick to grocery stores so I stay focused on the food. Venturing into Target is just asking to buy things you all of the sudden "need" but is not on your grocery list such as a first aid kit, a razor, papermate pens, easter grass, and bunny shaped pans. They are so cute, how could I resist making treats that looked like Bugs Bunny?..... eh, what's up doc?


INGREDIENTS:
  • 1 C. of white whole wheat flour 
  • 1 C. of grated carrots
  • 1 tsp. baking powder
  • 1 egg
  • 1/4 C. apple sauce
  • 1/4 C. olive oil
DIRECTIONS:
Wilton Wabbit Silicon Bunny Pan

1. Preheat oven 350 degrees.
2. Mix flour, carrots, baking powder, egg, apple sauce, and olive oil together. Dough should have consistency of play doh.
3. Scoop about 1 tbsp of dough and squish into the Wilton Rabbit Silicon Bunny Pan.
4. Bake for 20-22 minutes.

STORAGE:

Store in an airtight container once on counter after thoroughly cooled for up to 1 week . Waiting until cooled is an important step; condensation can build and the moisture will cause treats to mold.

For longer shelf life: store in fridge for up to 2 months. Store in freezer for up to 8 months.
Tip: Write date on plastic bag to keep track of expiration date.
Be vewy vewy quiet... I'm hunting wabbits!

Tuesday, March 19, 2013

Simple Chicken Nuggets for dogs

Brown Chicken Brown Cow
What's the sexiest animals on the farm?

Brown chicken brown cow - ow ow!

I had left over chicken from dinner today and decided to give my pooch a little happy meal. I threw 3 ingredients together, tossed it in the oven, and diced the chicken into small pieces. Happiest day of her life. It reminded me of my happy meal days.... oh like 2 weeks ago. Yeah, I still get happy meals - shhhhhh.

INGREDIENTS:
  • 1/2 chicken breast
  • 1/2 tbsp olive oil
  • 1/2 tsp dried or chopped parsley
Would you like fries with that?
DIRECTIONS:

1. Preheat oven 350 degrees.
2. Wash chicken and pat dry.
3. Toss in olive oil and parsley.
4. Bake for 25-30 minutes.
5. Cut into smaller chunks.
6. Serve with toy (optional).

STORAGE:

Store in an airtight container in the fridge after thoroughly cooled for up to 3 days .
Tip: Write date on plastic bag to keep track of expiration date.

Tuesday, November 22, 2011

Turkey Jerky & Green Beans

Adapted from petplace.com
 Out of shear laziness, I decided to make some turkey jerky while dehydrating green beans as a snack at the same time. Green beans are super easy, just wash, cut, and place on a cookie sheet right into the dehydrator or oven. In my case, an oven.

The turkey is a bit more work. I used some ground turkey, blended it with oil, and parsley and poured into a baking pan. These two simple foods are fantastic for your dog's health. Green beans are a good source of plant fibre, vitamin K, vitamin C, and manganese. It's a great weight management treat. Turkey is always a great source of lean protein.

Mochi was initially confused by the green beans. She spat it out and sniffed it. When I thought she was going to walk away from it, she picked it back up and started crunching on it. She loved em! I gave it a quick taste test too, not gonna lie, pretty tasty! Who would of thought green beans could taste so good on its own?

Looks like these treats are winner winner turkey dinner! Can one substitute one poultry for another?

INGREDIENTS:
  • 1/2 lb of lean ground turkey
  • 1 tbsp chopped parsley
  • 1 tbsp olive oil
  • 2 C. green beans, washed, trimmed, and cut in half
DIRECTIONS:

1. Preheat oven 225 degrees.

Turkey: (total bake time: 4 hours)
2. Puree turkey, parsley, and olive oil together in a blender.
3. Pour into a baking pan.
4. Bake in oven for 2 hours with door slightly open to let out moisture.
5. Flip over, use pizza cutter or knife to cut into individual pieces and bake for another 2 hours.
Tip: (learned this the hard way) use foil or parchment paper to ease clean up.


Green beans: (total bake time: 3 hours)
2. Place on cookie sheet.
3. Bake in oven alongside turkey jerky.
4. Flip every hour.
5. Green beans are done when crispy (approx 3 hours)


STORAGE:

Store in an airtight container in refrigerator after thoroughly cooled for up to 1 week.Waiting until cooled is an important step; condensation can build and the moisture will cause treats to mold.

For longer shelf life: Store in freezer for up to 8 months.
Tip: Write date on plastic bag to keep track of expiration date.

Monday, October 31, 2011

Pumpkin & Peanut Butter Brain Pupcakes

I...want...BRAINNNSSS! 


These pupcakes were so fun to make. I bought these Wilton 12-piece cupcake decorating set. You can make all sorts of fun designs. In the spirit of Halloween, I made the pumpkin icing look like brains.


Happy Halloween everyone! I hope y'all have a fun and safe time. This concludes our Howl-o-ween edition for 2011.
Some dogs like to dress up but not mine. Mochi acts like wearing a costume is a death sentence. Drama queen much?


INGREDIENTS:
(~6 pupcakes)
  • 1 C. of whole wheat flour (regular or white)
  • 1 egg
  • 2 tbsp olive oil
  • 1 tbsp. honey
  • 1/2 C. skim milk
  • 1/4 C. unsweeted & unsalted peanut butter
  • 1/8 C. pumpkin (not pumpkin pie filling)
  • 1/4 C. water
Frosting:
  • 1/4 C. pumpkin
  • 1 oz low fat cream cheese
DIRECTIONS:

1. Preheat oven 350 degrees.
2. Mix flour, egg, olive oil, honey, skim milk, peanut butter, pumpkin, and water together. Batter should be thick.
3. Pour into cupcake tins about 2/3 full.
4. Bake for 20 - 25 minutes. Let cool.
5. Mix 1/4 C. of pumpkin with 1 oz of cream cheese. Refrigerate for 30 minutes.
6. Using a Wilton #12 tip, pipe the left and right hemispheres of the brain then pipe the middle.

Cut into small pieces for your dog to avoid choking. Feed this treat sparingly as a very special treat. The honey and cream cheese gives this treat a higher sugar and fat content.

STORAGE:

Store in an airtight container for 5 days. 
Tip: Write date on plastic bag to keep track of expiration date.

Thursday, October 20, 2011

Chicken Eyeballs

Can you see what I see? I can eat what you see.
I made myself some chicken meatballs and decided that I should turn this into a dinner for two - meatballs for her and meatballs for me. Just cause it's halloween I added cheese and carrots to them to look like "eyeballs". The carrots dry out easily so I would recommend waiting until serving to add the garnishes. Being the awesome multi-tasker that I am (sarcasm - I'm mostly just lazy) I had two bowls out and made both recipes at the same time. I used my meatball recipe as a basic but opted out of everything that was bad for dogs which at the end left it to 5 ingredients. That's what happens when humans have an inferior sense of taste and smell - we need all these other flavors. Dogs can get the same enjoyment out of simple ingredients and, um, dirt and sticks but we won't go there.


INGREDIENTS:
(~20 eyeballs)
  • 1/4 C. of white whole wheat flour
  • 1 egg
  • 1 tbsp olive oil
  • 1 lb lean ground chicken
  • 1 tsp parsley
  • 1/4 C. grated parmesan cheese
  • 5 slices of thinly sliced white cheese (cheddar, provolone, go for reduced fat)
  • 20 carrot chips
DIRECTIONS:

1. Preheat oven 450 degrees.
2. Combine ground chicken, egg, olive oil, parsley, and parmesan cheese in a medium bowl. Mix well.
3. Add flour a little at a time to firm up the meatballs (in case they are droopy).


4. Form into golf size balls and place on a cookie sheet lined with foil
6. Bake for 20 minutes. Let cool.


7. Using the medium round cut-out, cut slices of cheese. Place circle onto center of meatball.
8. Using the smallest round cut-out, cut out the center of the eyeball and cut out about a 1/4'' chunk out of the middle.
9. Continue with the smallest round cut-out and cut carrot chip into small circles.
10. Place carrot circles into the center of the eyeball in the space that is cut out.


11. Place them over your eyes and pose for a picture. (optional)


12. Tease your poor dog. (also optional)


STORAGE:

Store in an airtight container once in fridge after thoroughly cooled for up to 1 week due to meat in the treat . Waiting until cooled is an important step; condensation can build and the moisture will cause treats to mold.

Store in freezer for up to 1 month.
Tip: Write date on plastic bag to keep track of expiration date.

Wednesday, October 12, 2011

Carrot Bwitch Fingers


I remember in the 1st grade, a little playmate I had, named Rachel, would tell me so-and-so to use the "b-word". Me being an innocent 6-year-old Asian girl who's first language was not English had no idea what the could be. Biscuit? Barbie? Whatever the B-word was, it wasn't allowed, but it was ok to say "the b-word".  In my 6-year-old brain, I thought "ok, maybe any letter before word was a bad word. I made up a story to Rachel and told her I heard little Jenny call little Jessica an "e-word". E was my favorite letter of course (for Erica, duh). She looked at me with a confused face and said she's never heard of it. I quickly fix my mistake and said I meant "b-word" and here comes the *GASP*.


Fast forward.

In 6th grade, it was a cool thing for 11 year-old-boys to use the actual curse word and then girls would giggle or gasp. I made quick friends with two girls named Amanda and Farrah in the 6th grade. We were standing in line one day for lunch and this conversation ensued:

*Amanda says something jerkish*
Farrah: *gasp* You are a witch with a b!
Amanda: I'm a bwitch?

So in honor of my relationship with English curse words, I give you Carrot Bwitch Fingers. I put carrots in a blender and mixed it with the dough to give it an orangy color (and it also amuses me when Mochi has bright orange poop). I used chopped up bell peppers as the fingernails.

INGREDIENTS:
(~18 fingers)
  • 1 1/4 C. of white whole wheat flour
  • 1 egg
  • 1 tbsp olive oil
  • 1/2 C. shredded carrots
  • 1/3 C. skim milk
  • 1 red and 1 green bell pepper, chopped
DIRECTIONS:

1. Preheat oven 350 degrees.
2. Blend carrots and milk until smooth.
3. Mix flour, olive oil, egg, and add carrot mixture.
4. Mix well and knead dough.
6. Take tablespoon sized pieces and roll into a finger shape.
7. Place fingers on ungreased cookie sheet.
8. Use a knife to put indentions on the fingers.
9. Place a piece of chopped bell pepper into the top of the finger. Use a scissor to trim to a desired shape.
10. Bake for 20 minutes.

STORAGE:

Store in an airtight container once on counter after thoroughly cooled for up to 2 weeks . Waiting until cooled is an important step; condensation can build and the moisture will cause treats to mold.

For longer shelf life: store in fridge for up to 2 months. Store in freezer for up to 8 months.
Tip: Write date on plastic bag to keep track of expiration date.

Thursday, October 6, 2011

Dirt Peanut Butter Cups - Worms, Mud, and Dirt oh my!

Diggin' this dog treat? 
I remember in Mrs. Hall's class in the 5th grade, we would watch scary movies, write scary stories, and share them in the dark with a flash light. Mrs. Hall would also bring in these oreo dirt pudding cups for Halloween.  It was my favorite part of class - chocolately, crunchy, and gummi - a kid's dream come true.

So for this Halloween, I wanted to make my pup's dream come true by turning my favorite childhood Halloween dessert into a dog treat version. I spent some time thinking about what I would use for oreos or chocolate pudding instead since those are big no-nos for dogs. I wanted to put them into cupcake liners but was afraid Mochi would eat the paper. 


Borrowing ideas from my last two recipes (bat crisps, mini pies) I used a mini cupcake tin and lined it with a similar pie crust recipe. I filled the cooked pie cups with unsweetened/unsalted peanut butter to replace pudding. I then crushed the bat crisps to look like oreos. Lastly, in place of gummi worms, I used chicken sausage. I went all the way to whole foods to find sausage with the least crap in it. I swear Mochi eats better than I do.


INGREDIENTS:
(~20 mini cups)
  • Pie cups:
    • 1 C. of whole wheat pastry flour
    • 2 tbsp olive oil
    • 1/4 C. skim milk
  • 1 C. unsweetened, unsalted peanut butter
  • 2 chicken sausages sliced lengthwise into 1/4'' thick strips, cut in half
  • 1/2 C. of crushed black bean bat crisps
DIRECTIONS:

1. Preheat oven 350 degrees.
2. Mix together flour, olive oil, and skim milk. Knead dough.
3. Roll to 1/8'' thickness. 
4. Using a 2" circle cookie cutter, cut into circle shapes.
5. Flatten circle to stretch dough out slightly.
6. Put into mini cupcake pan.
7. Poke holes at bottom of the pie cup with fork to avoid bubbles and air rising in the pie cups.
8. Bake for 18 minutes.

9. Bring a small pot of water to boil.
10. Add chicken sausage strips and reduce to medium heat.
11. Let simmer until strips curl. Drain.
12. Let pie cups completely cool then fill with 1/2 tbsp of peanut butter.
13. Top with crushed bat crisps and chicken sausage strips.

How spooky... 13 steps. Coincidence? Yeah, probs.

STORAGE:

Store in an airtight container for up to 1 week due to meat in the treat.
Tip: Write date on container to keep track of expiration date.

Wednesday, September 28, 2011

Apple & Banana Mini Pie

Aypples and Ban-nay-nays
Fall is the season for apple picking. I went apple picking 2 weeks ago and brought home 10 lbs of apples.... for myself. What is a girl and a pup gonna do with 10 lbs of apples? I made a Caramel Apple Pie for myself and a Apple & Banana Mini Pie for Mochi. Give these dog treats sparingly... I fed mochi a whole mini pie yesterday and let's just say the poopy bag was a tad heavy today.

Mochi's verdict: She likes to oat oat oat o-ppals and ban-no-nos.


INGREDIENTS:
  • Crust:
    • 1 1/4 C. whole wheat pastry flour
    • 1/4 C. grated parmesan cheese
    • 1 egg
    • 1/4 C. skim milk
    • 2 tbsp olive oil
  • Filling:
    • 1 banana
    • 1 apple, chopped into small pieces
    • 1 egg
    • 1/2 tbsp skim milk
DirectionS:
1. Preheat oven to 350 degrees F.
2. In a medium bowl, mix whole wheat pastry flour and parmesan cheese.
3. Add egg, milk, and oil. Stir.
4. Knead the dough.
5. Roll out dough to less than 1/4''.
6. Use a 5'' circle cookie cutter or glass to cut circles. (~10 circles, 5 for bottoms 5 for tops or 10 topless pies)
Ee-pples and Ban-nee-nees
7. Press into muffin tins. Prick bottom of pie crust with a fork.
8. Bake pie crusts for 10 minutes.
9. Take out of oven and let the pie crusts cool.
10. Next on to the filling: put banana, apple, egg, and milk into a food processor or blender.
11. Put the filling in after pie crust cools.
12. Add designs to pie crust tops (mini apple cookie cutter, lattice, etc.)
13. Lay pie crusts on top. Trim edges and press dough to adhere to crust side walls.
14. Bake for 25 minutes.

Voila! Home made apple & banana pie dog treats!

Storage:
Due to the fruit filling, store in an airtight container for no more than 2 days at room temperate, in a refrigerator for up to 5 days or freeze up to 3 months.

Tuesday, September 20, 2011

Squash Chicken Jerky


Cheeeeken
Giving the chicken jerky a lil sumtin sumtin....The squash gives the jerky a dark color and it looks more "smoked" if you will. It also smelled amazing. I took it out of the oven and I almost wanted to eat it myself but I'm not even a fan of human jerky. Oh gosh, I did it again. When I was talking about chicken jerky for Mochi at work I told a coworker "making the chicken jerky for dogs is the same process as human jerky" Totally came out wrong.... I meant "making the chicken jerky for dogs is the same process making jerky for humans" Be careful of wording or you'll come off as Hannibal Lecter. Probs not the best reputation at work.

Regardless... Mochi loooooved these treats. She couldn't get her mind off of it even when I showed her the new toy from amazon that I got her - a 16 squeaker alligator. She usually loves anything that squeaks so I thought she would love this times 16 but no response. Her eyes were glued to the chicken. It's all about the jerky. You know what they say... bitches love them jerk(y)s. Get it? Mochi is a female dog. Oh nevermind.

INGREDIENTS:
  • 1 chicken breast
  • 1 jar of squash baby food
  • 1 tbsp olive oil
  • 2 tbsp unsalted chicken broth
DIRECTIONS:
1. Rinse chicken and remove fat. Fat causes the jerky to spoil faster.
2. Slice chicken breast into thin 1/8'' to 1/4'' slices. Slice with the grain.
3. Combine squash baby food, olive oil, and unsalted chicken broth. Stir.

4. Place the chicken slices in the squash marinade and turn to evenly coat.

5. Cover and refrigerate for at least 1 hour
6. Preheat oven to 180 degrees.
7. Place chicken on wire racks, keep slices separated. Use baking sheets if you do not have wire racks and turn every hour.
8. Place chicken on racks in oven for 3 or more hours.*
* Due to difference in meat size and ovens baking time may vary. Your jerky treats should be firm and dry. If in doubt, it is safer to go a little more dry and firm than underdone.

Storage:
Store your chicken jerky treats in the refrigerator for 2 weeks. Freeze for up to 8 months. Write date on the plastic bag to ensure treats are eaten in a timely matter.

Breath Freshin' Chicken Jerky


Ain't nobody dope as me your breath so fresh so clean
I started clipping coupons here and there (made an attempt at my own version of extreme couponing but find it's unrealistic). Of course, I came across coupons for dog treats from beggin' strips to rawhides and these Milo Kitchen's treats. I cut a few to give Mochi a new treat. Sneaky girl always seems to know when a grocery bag contains new treats or toys. Spoiled brat. 

I use to feed the dogs I had previously beggin' strips but upon turning over that label, I realized it's nothing but fillers. Treats should add nutritional value to your pups. I mosey on over to the Milo's Kitchen treats... there is attractive packaging and it looks convincing enough that it's good for you pets health. There's a limited number of ingredients and that's usually a good sign. However, one red alert is that they do use garlic powder. Granted, a large amount of garlic powder is needed to make a dog sick but the same goes for chocolate and you don't see me dipping my dog's treats in chocolate. So I avoided those treats. The only ones that seemed suitable enough for me to buy was the Milo Kitchen's Chicken Jerky.

Mochi grabbed these jerky treats right out of the grocery bag and gobbled it in only a few bites. Seeing how much she loved them, I took a stab at making some home-made jerky. It is healthier since home-made jerky doesn't have preservatives and what not.  I also added some parsley to keep her breath so fresh and so clean clean. 

PR Intern verdict: She loved 'em just as much and now has fresher breath!

INGREDIENTS:
  • 1 chicken breast
  • 2/3 C. unsalted chicken broth
  • 1 tbsp olive oil
  • 1/2 C. water
  • 1/2 tbsp dried parsley
DIRECTIONS:
1. Rinse chicken and remove fat. Fat causes the jerky to spoil faster.
2. Slice chicken breast into thin 1/8'' to 1/4'' slices. Slice with the grain.

3. Combine unsalted chicken broth, olive oil, water, and parsley. Stir.

4. Place the chicken slices in the broth marinade and turn to evenly coat.
5. Cover and refrigerate for at least 1 hour
6. Preheat oven to 180 degrees.
7. Place chicken on wire racks, keep slices separated. Use baking sheets if you do not have wire racks and turn every hour.
8. Place chicken on racks in oven for 3 or more hours.*
* Due to difference in meat size and ovens baking time may vary. Your jerky treats should be firm and dry. If in doubt, it is safer to go a little more dry and firm than underdone.

STORAGE:

Store your chicken jerky treats in the refrigerator for 2 weeks. Freeze for up to 8 months. Write date on the plastic bag to ensure treats are eaten in a timely matter.

Sunday, September 18, 2011

Apple Oatmeal Dog Cookies

Apple Oatmeal Cookies


How do you like them apples?
One of the fall things to do is to go apple picking. In Minnesota, there's an apple farm in Still Water, MN called Aamodt's Apple Farm. There's a bakery that sells apple everything! They sold apples by the pound, apple cider, apple cider donuts, an assortment of apple butter, apple jam, apple pie, apple turnovers, apple muffins, apple oatmeal cookies, and so much more! Outside the bakery is a stand that sells apple bratwurst. Next door is a wine tasting joint. Right out back on a dirt trail, you can purchase a bag for $12 and pick apples to your hearts content. Honeycrisps were sold out within 3 hours of the farm opening so all that is left are sweet 16 apples. They are bright and tart, good for eating and baking. They remind me of the granny smith apples and I'm pretty excited to make apple turnovers with them (for myself of course).

I'm staring at my 2 bowls worth of apples (~20+ apples) and wondering what the heck am I gonna do? Eat turnovers for days? Then I had the bright idea of replicating the apple oatmeal cookies for Mochi. She had fun eating bits and pieces of apples as I was making her treats.

Critical reception: Mochi already loves apples and oatmeal, now a treat that features both thing she loves? Automatic win.

INGREDIENTS:
  • 1 C. of Instant Oatmeal (approx. 3 packets)
  • 1 Tsp. Baking Powder
  • 1 1/2 C. White Whole-Wheat Flour
  • 1 Egg
  • 1 C. finely chopped sweet 16 apples (approx. 2 small/medium apples)
  • 2 Tbsp. Olive Oil
  • 1/2 C. Water

DIRECTIONS:

Preheat oven 350 degrees.
2. Mix together oatmeal, flour, and baking powder.
3. Slowly mix in egg, apples, olive oil, and water.
4. Dough should be moist but not wet. Knead for a minute.

5. Option A: Roll out dough to 1/4" thickness. Using cookie cutters of your choice, cut out shapes and place on baking sheet.
Option B: Scoop out in 1/2 tablespoon increments and roll into ball and press into a cookie shape.
6. Bake for 20 minutes.


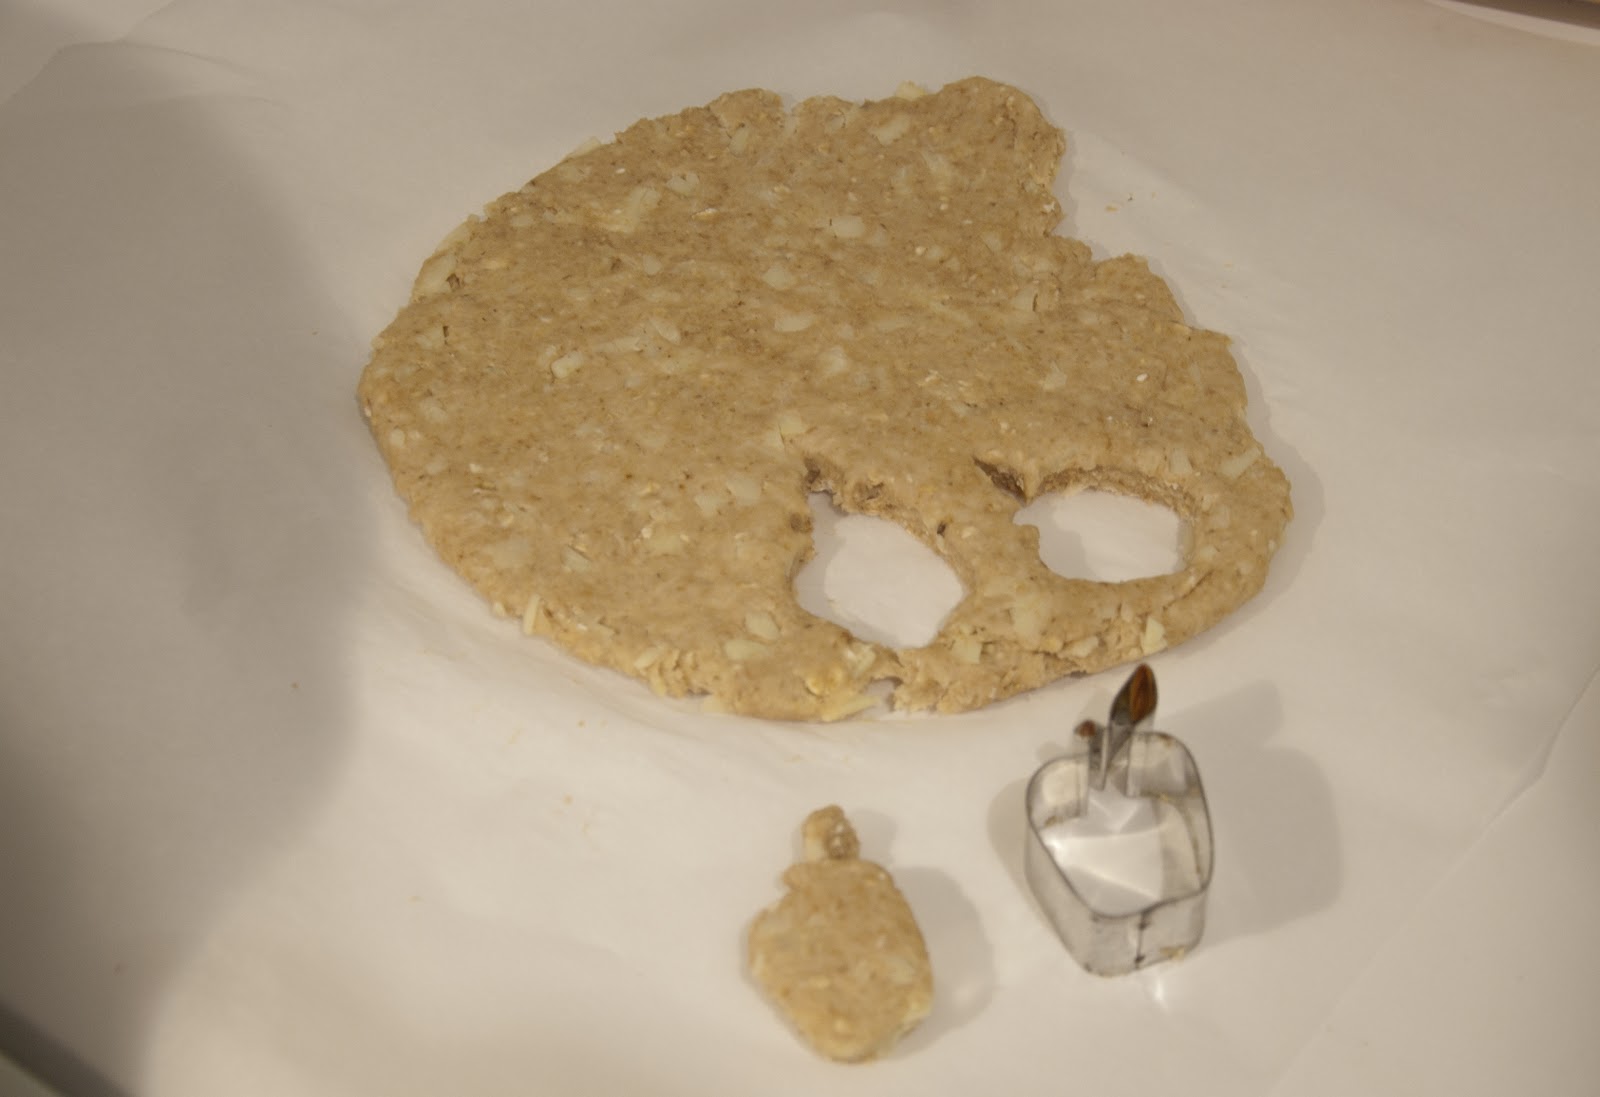
Apple Shaped
Didn't we talk about how I have ADD and have to make different shapes? I got tired of making balls and squishing them so I pulled out the apple shape from my mini fruit shape cutters and cut out some apple fruit shaped treats. 


STORAGE:

Store in an airtight container once on counter after thoroughly cooled for up to 2 weeks . Waiting until cooled is an important step; condensation can build and the moisture will cause treats to mold.

For longer shelf life: store in fridge for up to 2 months. Store in freezer for up to 8 months.
Tip: Write date on plastic bag to keep track of expiration date.

Oatmeal Dog Treats

This recipe is adapted from  All Natural Dog Treat.
I was kinda weary of oatmeal at first. I'm not a huge fan of it myself. I always think of old people. It doesn't help with the century old quaker dude in the front of the oatmeal packaging. I read up that oatmeal is good for dogs and that they love them. I mean Mochi loves to eat dirt and trash so might as well give oat meal a shot. Dude. She is in love with these treats! I've never seen her so crazy over a treat. I usually bribe her into her crate with treats. Whenever she saw me pull these oatmeal treats out she immediately ran into her crate, no questions asked. Thanks oat meal guy! Hope your pup enjoys them as much as Mochi. It's a great tool to sucker them into the crate :)


Ingredients:
  • 3 Cups of Instant Oatmeal
  • 1 1/2 Cups white whole-wheat flour
  • 1 1/2 Cup cold water
  • 1 Tablespoon parsley, chopped
  • 2 Eggs
  • 1 Teaspoon baking soda

Directions:
1. Preheat oven to 350 degrees.
2. Mix all ingredients together.
3. Spoon onto a greased cookie sheet.
4. Bake 12 to 15 minutes at 350 degrees.
5. Place on a cooling rack.

STORAGE:
Store in an airtight container once on counter after thoroughly cooled for up to 2 weeks . Waiting until cooled is an important step; condensation can build and the moisture will cause treats to mold.

For longer shelf life: Store in fridge for up to 2 months. Store in freezer for up to 8 months.
Tip: Write date on plastic bag to keep track of expiration date.

LinkWithin

Related Posts Plugin for WordPress, Blogger...